To run:
modprobe snd_intel8x0m
slmodemd --alsa hw:1
modprobe snd_intel8x0m
slmodemd --alsa hw:1
X11Forwarding yesNow, you'll need to re-ssh to LM using Putty. Check the event log ensure that "X11 forwarding enabled" is there and on the terminal type echo $DISPLAY whether it's been set by Putty.
X11DisplayOffset 10
X11UseLocalhost yes
And, restart sshd
/etc/rc.d/rc.sshd restart


xrdb $HOME/.Xresources
xsetroot -solid grey
xterm -geometry 80x24+10+10 -ls -title "$VNCDESKTOP Desktop" &
twm &
makeThen, we need to make a configuration file, /etc/wpa_supplicant.conf. The entry of the file as provided by http://opensource.nus.edu.sg/wiki/index.php/Connecting_to_PEAP_in_NUS and here:
cp wpa_cli wpa_supplicant /usr/local/bin
ctrl_interface=/var/run/wpa_supplicantThe content of ase1.pem is as such :
network={
ssid="NUS"
scan_ssid=1
key_mgmt=IEEE8021X
eap=PEAP
ca_cert=”/etc/cert/ase1.pem”
phase2=”auth=MSCHAPV2”
}
Then, run the wpa_supplicant using :-----BEGIN CERTIFICATE-----
MIIDJzCCApCgAwIBAgIBATANBgkqhkiG9w0BAQQFADCBzjELMAkGA1UEBhMCWkEx
FTATBgNVBAgTDFdlc3Rlcm4gQ2FwZTESMBAGA1UEBxMJQ2FwZSBUb3duMR0wGwYD
VQQKExRUaGF3dGUgQ29uc3VsdGluZyBjYzEoMCYGA1UECxMfQ2VydGlmaWNhdGlv
biBTZXJ2aWNlcyBEaXZpc2lvbjEhMB8GA1UEAxMYVGhhd3RlIFByZW1pdW0gU2Vy
dmVyIENBMSgwJgYJKoZIhvcNAQkBFhlwcmVtaXVtLXNlcnZlckB0aGF3dGUuY29t
MB4XDTk2MDgwMTAwMDAwMFoXDTIwMTIzMTIzNTk1OVowgc4xCzAJBgNVBAYTAlpB
MRUwEwYDVQQIEwxXZXN0ZXJuIENhcGUxEjAQBgNVBAcTCUNhcGUgVG93bjEdMBsG
A1UEChMUVGhhd3RlIENvbnN1bHRpbmcgY2MxKDAmBgNVBAsTH0NlcnRpZmljYXRp
b24gU2VydmljZXMgRGl2aXNpb24xITAfBgNVBAMTGFRoYXd0ZSBQcmVtaXVtIFNl
cnZlciBDQTEoMCYGCSqGSIb3DQEJARYZcHJlbWl1bS1zZXJ2ZXJAdGhhd3RlLmNv
bTCBnzANBgkqhkiG9w0BAQEFAAOBjQAwgYkCgYEA0jY2aovXwlue2oFBYo847kkE
VdbQ7xwblRZH7xhINTpS9CtqBo87L+pW46+GjZ4X9560ZXUCTe/LCaIhUdib0GfQ
ug2SBhRz1JPLlyoAnFxODLz6FVL88kRu2hFKbgifLy3j+ao6hnO2RlNYyIkFvYMR
uHM/qgeN9EJN50CdHDcCAwEAAaMTMBEwDwYDVR0TAQH/BAUwAwEB/zANBgkqhkiG
9w0BAQQFAAOBgQAmSCwWwlj66BZ0DKqqX1Q/8tfJeGBeXm43YyJ3Nn6yF8Q0ufUI
hfzJATj/Tb7yFkJD57taRvvBxhEf8UqwKEbJw8RCfbz6q1lu1bdRiBHjpIUZa4JM
pAwSremkrj/xw0llmozFyD4lt5SZu5IycQfwhl7tUCemDaYj+bvLpgcUQg==
-----END CERTIFICATE-----
wpa_supplicant -i eth1 -c /etc/wpa_supplicant.conf -BMight want to try using -Dwext or -Dipw (deprecated)
wpa_gui &Obtain ip address using:
dhclient eth1To connect to NUSOPEN (NUS open network), set the essid to NUSOPEN:
iwconfig eth1 essid "NUSOPEN"then obtain the ip address using dhclient as before (or dhcpcd eth1).
cd /usr/src/linuxUnder "Power management options (ACPI, APM)" tab, check whether "suspend to RAM and standby" exists. If it doesn't, I suppose suspend is not supported by your kernel.
make xconfig
echo -n "mem" > /sys/power/statePress Fn button on your thinkpad to resume.
cd /bootIt will create /boot/initrd.tgz file, that we'll want to load it along with the kernel at boot time. Now edit the /etc/lilo.conf :
mkinitrd -c -k 2.6.23-smp -m ext3 -f ext3 -r /dev/hda2
kedit /etc/lilo.confThe linux part should look like this :
image = /boot/vmlinuzThen, run lilo and reboot to check whether it works.
initrd = /boot/initrd.gz
root = /dev/hda2
label = newLinux
read-only
image = /boot/vmlinuz-huge-smp-2.6.21.5-smp
root = /dev/hda2
label = oldLinux
read-only
Basically, acpid just executes scripts residing inThen reboot, to restart the acpi daemon./etc/acpi/actions. Which script to launch at which event is configured in several files in/etc/acpi/events. All actions are documented in/var/log/acpid.
The event script needs to be created within/etc/acpi/eventsand can have any name you like. In this case we call it lid because it will trigger the lid event. Do# vi /etc/acpi/events/lidand make it look like this:event=button/lid
action=/etc/acpi/actions/sleep.sh %eThe "event" line is a regular expression specifying the events we're interested in. You can determine what the event strings are from looking at
The "action" line is the command to be executed when these events are dispatched. In this example we call the/var/log/acpidafter trying to suspend, close the lid, etc. . You can find information about the event strings ibm-acpi generates for certain keys at the Special Keys HOWTO.sleep.shscript residing in/etc/acpi/actionsand pass the event description text using the %e placeholder.
Our example/etc/acpi/actions/sleep.shscript looks as follows:#!/bin/sh
# if launched through a lid event and lid is open, do nothing
echo "$1" | grep "button/lid" && grep -q open /proc/acpi/button/lid/LID/state && exit 0
# remove USB 1.1 driver
rmmod uhci_hcd
# sync filesystem and clock
sync
/sbin/hwclock --systohc
# switch to console
FGCONSOLE=`fgconsole`
chvt 6
/usr/sbin/radeontool light off
# go to sleep
sleep 5 && echo -n "mem" > /sys/power/state
# readjust the clock (it might be off a bit after suspend)
/sbin/hwclock --adjust
/sbin/hwclock --hctosys
# reload USB 1.1 driver
modprobe uhci_hcd
# turn on the backlight and switch back to X
radeontool light on
chvt $FGCONSOLE
ln -s /usr/local/lib/libntfs.so.10 libntfs.so.10Then in /etc/fstab, add:
ln -s /usr/local/lib/libfuse.so.2 libfuse.so.2
setenv KDEWM blackbox
SopCast client version 1.0.2 library dependencyThen, from konsole:
If you don't have stdc++ 5 in your system, please download the libstdcpp5.tgz from
www.sopcast.com, and copy the
libstdc++.so.5
libstdc++.so.5.0.1
to /usr/lib/
The copy command must be:
cp -a libstdc++.so.5* /usr/lib
With '-a' parameter, and you must login as root.
1. sp-sc-auth
A simple example of sp-sc command line.
./sp-sc-auth sop://broker.sopcast.com:3912/6098 3908 8908 > /dev/null &
Start to transfer channel 6098, and you can play it on 8908 with VLC or mplayer
by open the url: http://localhost:8908/tv.asf
mplayer -zoom http://localhost:8908/tv.asfWhat's interesting from the Linux version of vlc is that here we could stream several channels at the same time, which is not possible in that of Windows XP's.
Start streaming channel 1(Channel ID:6001, Port: 8908)
./sp-sc-auth sop://broker.sopcast.com:3912/6001 3908 8908 > /dev/null &
Show the channel at mplayer:
mplayer http://localhost:8908/tv.asf
Start streaming channel 2:(Channel ID:6002, Port 8909)
./sp-sc-auth sop://broker.sopcast.com:3912/6002 3908 8909 > /dev/null &
Show the channel at mplayer: (Note, now the TCP port is 8909)
mplayer http://localhost:8909/tv.asf
etc
#!/bin/bash
cd /usr/lib/python2.5/idlelib/
python PyShell.py &
cd ~
First download the slackbuild script here.
Untar it.
Download the source from here.
Copy the source the the slackbuild directory:
cp OOo_2.3.0_LinuxIntel_install_en-US.tar.gz openoffice.org
Make the script executable:
chmod +x openoffice.org.SlackBuild
./openoffice.org.SlackBuild
When done creating the package, install it with installpkg:
cd /tmp
installpkg openoffice.org-2.3.0_en_US-i586-1_SBo.tgz
modprobe usb-storageSlocate: It provides a secure way to index and quickly search for all files on
cd /mnt
mkdir usbflash
nano /etc/fstab
add: /dev/sda1 /mnt/usbflash vfat,ntfs noauto,owner,user,umask=0 0 0
The sda1 represents the device name that the kernel gives the USB flash when it gets plugged in.
mount /mnt/usbflash
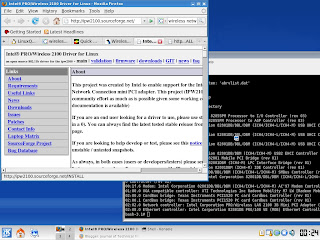
slocate -uWireless LAN: Based on /sbin/lspci, the driver for the system (IBM Thinkpad T40) is Intel Corporation PRO/Wireless LAN 2100 3B Mini PCI Adapter. After searching the net, I've got these results: http://ipw2100.sourceforge.net/, http://jrblevin.freeshell.org/linux/ipw2100/, http://ipw2100.sourceforge.net/. According to the installation manual , starting with Linux kernel version 2.6.14, an old stable version of the Intel PRO/Wireless 2100 Network Connection driver is provided in the kernel. All we need to do is to download the firmware from http://ipw2100.sf.net/firmware.php , untar it, and copy all the files to /lib/firmware. The specific files are :
slocate
ipw2100-(version number).fw Boot strap imageLoad the module with:
ipw2100-(version number)-i.fw Used in IBSS mode
ipw2100-(version number)-p.fw Used in monitor mode
modprobe ipw2100check the output of dmesg to see if it is successful:
dmesg | tailSlackpkg: is a tool to install or upgrade Slackware official packages from a mirror.
Download the tarball2. Adobe Reader
tar zxvf install_flash_player_9_linux.tar.gz
cd install_flash_player_9_linux/
cp libflashplayer.so ~/usr/lib/mozilla/plugins/
cp flashplayer.xpt ~/usr/lib/firefox-2.0.0.4/components/
Download the tarball3. JRE
tar zxvf AdobeReader_enu-7.0.9-1.i386.tar.gz
cd AdobeReader
./INSTALL
all the files are installed at /usr/local/Adobe/Acrobat7.0/
acroread
expr: syntax error message shows, to work it out :
nano /usr/local/Adobe/Acrobat7.0/
comment the line : check_gtk_ver_and_set_lib_path "$MIN_GTK_VERSION"
i.e. # check_gtk_ver_and_set_lib_path "$MIN_GTK_VERSION"
The Slackware package can be found from the slackware stable repository
http://plugindoc.mozdev.org/faqs/java.html#Linux
ln -s /usr/lib/jre1.6.0_02/plugin/i386/ns7/libjavaplugin_oji.so /usr/lib/mozilla/libjavaplugin_oji.so
